In the automotive shop environment, hydraulic equipment is used for lifting vehicles and heavy parts. Most automotive shops have hydraulic or electric / hydraulic lifts for lifting vehicles high in the air for convenience and better productivity when they are worked on. Hydraulic jacks are used for heavy parts and will be covered in a separate document. The focus for this document will be on car lifts.
In-ground vs Above-ground Lifts
The most common types of automotive lifts fit into two main categories. They are the in-ground lift and the above-ground (surface mount) lift. When the lifting mechanism is located below the floor, the lift is an in-ground lift. In-ground lifts were the dominant lift type used until the 1980’s. Above ground lifts emerged in the 1970’s and gained in popularity for many reasons. Today, the above ground surface mounted lifts make up the largest segment of total auto lifts in use and includes types such as the 2 Post Lift. Surface mounted lifts are typically bolted to the garage floor and are typically powered by an electric motor which operates either a hydraulic pump and cylinders or a screw type drive.
Types of 2 Post Lifts
Within the above ground Two Post Lift category there exist several different styles, but two main types:
2 Post Frame Contact Lift
An advantage to frame contact lifts is that the wheels hang free, which makes it easier to perform tire, brake and suspension work. They also provide better access to the underside of the vehicle for many other types of service.

Frame Contact Lift - Weaver Lift model (above) W-Pro10 Certified
2 Post Drive On Lifts
An advantage to the wheel contact drive-on 2 post lift is the quick setup time to drive the vehicle onto the lift without setting any lift arms to the lifting points. These lifts provide quick setup for quick services like oil changes but are more expensive with the addition of runways and jacks to get the wheels free. The runways also provide a means to be level for wheel alignment service.

Wheel Contact Drive-On Lift (above)
Frame Contact Lifts
Frame contact 2 post lifts have adapters on the end of adjustable telescoping lift arms. The lift adapters contact the vehicle frame or rocker panels at the manufacturer’s specified lifting points. Be sure to consult the service information before trying to lift a car. If lifted improperly, body, suspension, or steering components can be bent. The windshield may even pop out or the vehicle may fall off the lift.
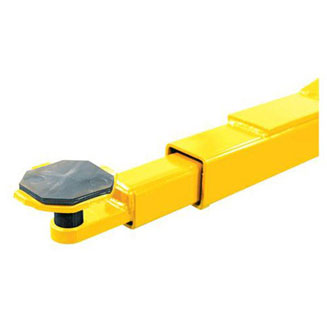
Lift Arm with Pad Adapter- shown with Rubber Pad (above)
In 1992, the Society of Automotive Engineers adopted a standard (SAE J2184) for vehicle lifting points. Some manufacturers label their vehicles with decals depicting the recommended lift points. These are located inside the passenger side front door. Permanent markings on the underside of the chassis also mark the lift points. These markings can include a hole, a boss, or a ¾” depression of a triangle. Lifting points guides are also available from the Automotive Lift Institute website and are included with the purchase of an ALI/ETL certified lift.
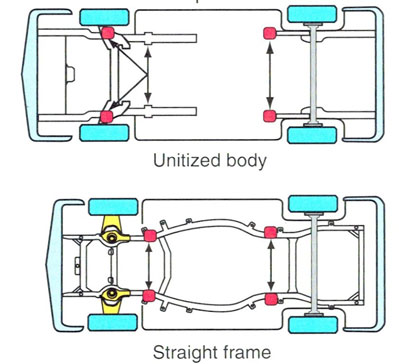
Always check the lifting points guide or manufacturers manual for each vehicle. 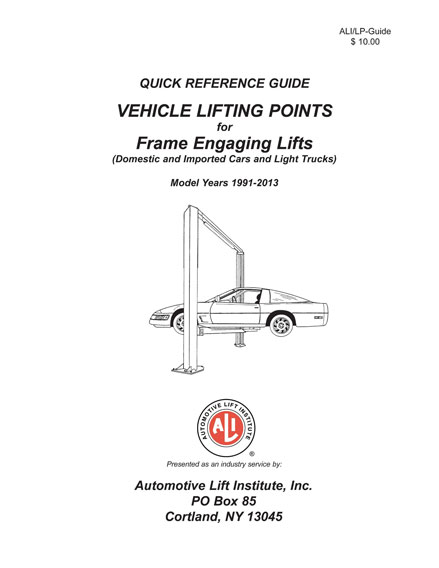
Lift Points on a Car - ALI Lifting Points Guide
Some 2 post lift adapters flip up. These adapters, sometimes call “foot pads or lift pads”, are adjustable to several positions to accommodate different heights between the lift points in the front and rear of the vehicle and to provide clearance between the rocker panel and the lift arm. Some lift pads have screw threads that allow them to be adjusted higher or lower. Other adapters use rubber pads. Be sure to keep rubber pads in good condition and free from grease and oil that may make them slippery.
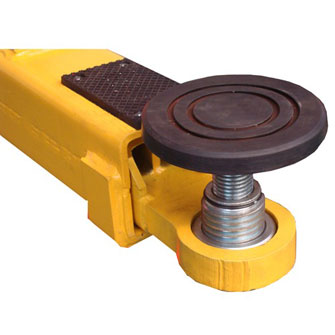
Lifting Pad with 2-Stage Telescoping Screw Pad (above)
Special Height Adapters/Extenders - Truck Adapters
Some sport utility vehicles, light trucks and vans require special height adapters to provide clearance between the lift arm and the rocker panel. Some height adapters are stacked with pegs that plug into each allowing the lift pad to stay on top to contact the frame or rocker panel. If the lift points on the vehicle are undercoated, a special adapter might be needed when using a lift that has steel adapters. Damaging the undercoating can void some vehicle’s rust protection warranty. Most lift manufacturers make these adapters available - Weaver brand adapters are a common accessory for Weaver Lifts. Do not use makeshift adapters.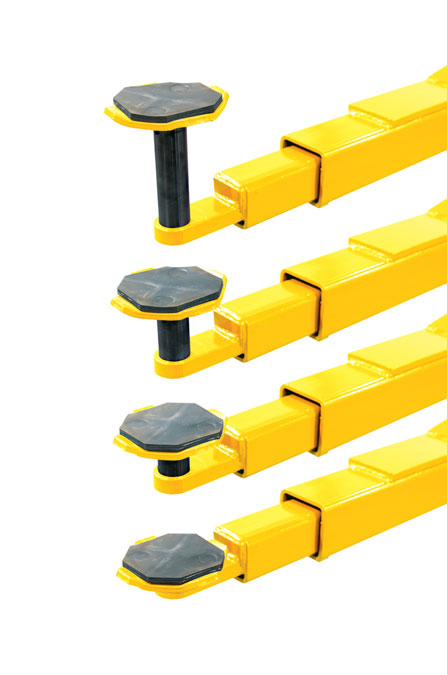
Lift pad with various Truck Adapters / Height Adapters (above)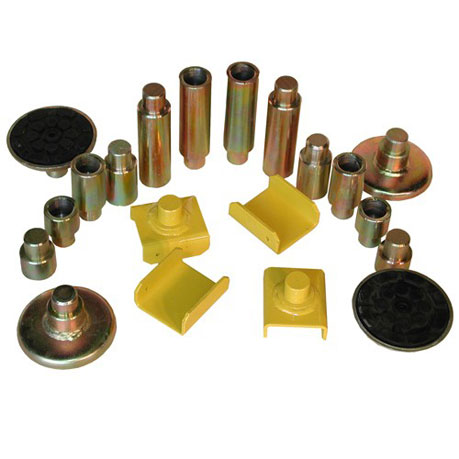
Complete 2-Post Lift Adapter Set with Rubber Pads and U-Shaped Frame Adapters (above)

U-Shaped Frame Adapter cradles the frame (above)
Safety Note - Adapters must be placed at the manufacturer’s recommended lifting points and must be set to raise the vehicle in a level plane or the vehicle will be unstable.
Safety Note - Flip-Up style lift pads should face either towards each other or away from each other to form a “V” or an “A”. This means that if the topside of the front adapters are leaned toward the front of the vehicle then the rear adapters need to have the topside of the rear adapters leaned toward the rear of the vehicle (forming a “V”). Likewise, if the topside of the front adapters are leaned towards the rear of the vehicle then the topside of the rear adapters need to be leaned towards the front of the vehicle (forming an”A”).
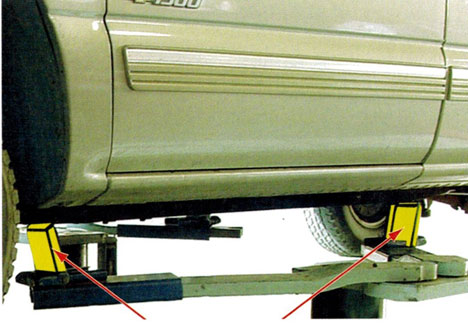
Flip-Up adapters shown here forming a “V” with the topside of the adapters away from each other. This method is used on both inground and above ground lifts with flip-up adapters.
Wheel Contact Drive-on Two Post Lift Methods & Advantages
The wheel contact drive-on lift is equipped with runways instead of lift arms. This lift type is one which all four wheels are supported. Roller jacks can be added in between the runways to provide a means for lifting the wheels free from the runways. These jacks, which are air or hydraulic powered, are used to raise either end of the car for wheels free service work. After the vehicle is raised, the jack is lowered onto a mechanical safety latch. When using one of these jacks, keep hands clear and be sure to extend each of the lift arms an equal amount to avoid uneven loading. Be sure that a wheels free jack is lowered all of the way before driving into or out of the lift.
When driving a vehicle onto a wheel contact lift, be sure that the front tires are centered, at equal distances from the edges of the ramps. These lifts have secondary stops for roll-off protection at the front and rear. After spotting the vehicle, always use manual wheel chocks to prevent the car from rolling.
Wheel Contact Drive-On 2-Post Lift (above)
Some advantages of wheel contact drive-on lifts are:
1) A vehicle can be raised safely even when its engine has been removed. Trying to lift such a vehicle on a frame contact lift can be dangerous because the center of gravity has been changed and the load could become unbalanced.
2) The center of the underside of the vehicle is accessible. This is important for exhaust system and transmission work.
3) For quick, easy service, the vehicle requires no set up of lift adapters.
4) Wheels are in contact with the wheel ramps. This is necessary for wheel alignment and exhaust work.
How to Install 2 Post Surface Mount Lifts
Above ground surface mount lifts became popular in the 1970’s. They are mounted completely above the concrete floor. Different lifts have different foundational requirements. Most surface mount lifts require a minimum of 4” depth concrete with a minimum compressive strength of 3000 PSI to support the anchor bolts. Lifts with higher rated capacities can require a minimum of 6” depth of concrete. Anchor bolts must be torqued to the manufacturer’s specification and checked periodically according to the maintenance guide in the lift's manual. There are also specifications for the minimum amount of depth the anchor bolt needs to be embedded in the concrete. For example, most 2-post lifts up to 10,000 lb. capacities will require an anchor bolt that is 5.5” length by ¾” width with a minimum embedment depth of 3.25”. This means once the bolt is torqued to spec, the minimum amount above the floor must be no more than 2.25” to achieve the minimum of 3.25” embedment.

Ease of installation is one advantage of surface mount lifts. They are also relatively portable and can be relocated in another location in case a business or shop owner decides to move to another location. They also do not have the problem of pollution of the ground water like an in-ground lift, if a hydraulic fluid leak occurs.
A surface mount lift is also easier to maintain or repair because it requires no excavation. Surface mount lifts are also less likely to leak oil into the ground (an environmental concern).
The most popular style of surface mounted lifts is a two-post, drive through, frame engaging type. It has two lifting carriages, each one supporting two swing arms. The carriages are synchronized so that they travel as level and together as possible. To keep the two carriages moving together, steel cables, chain, synchronized motors or hydraulic circuits are used. The most common synchronization type in the USA is the steel cable.
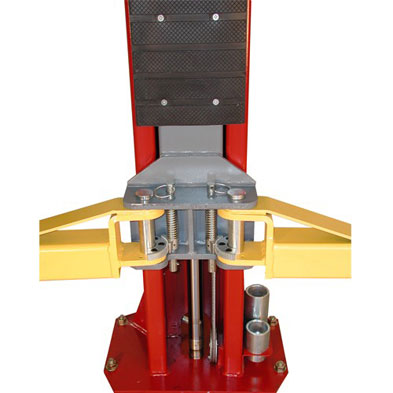
The steel synchronization cable and pulley is shown to the right of the hydraulic cylinder.
The synchronizing cables and parts are attached to each post either by routing through an overhead beam or underneath a floor plate cover. The overhead beam style usually requires a minimum of a 12 foot ceiling height and leaves the floor clear between the columns. The floor plate design is usually used with a lower ceiling height. Most floor plate designs will fit under a 10 foot ceiling.
The cables do not carry the lift load, they are only used for equalization of the hydraulic cylinders. The load is borne by the cylinders, carriages and lift arms. Adjusting the cables allows the safety locks in each column to be level and engage at the same time.
The hydraulic system consists of an electric power unit, hydraulic hoses and the two cylinders (one in each column). The power unit includes the electric motor, pump and reservoir tank all in one unit.
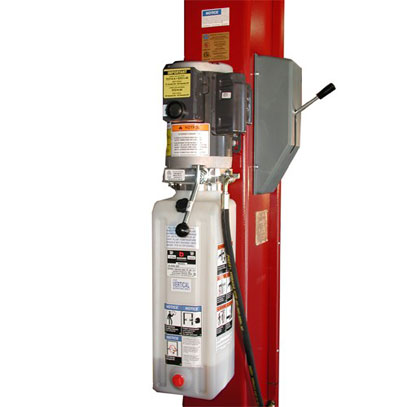
Electric / Hydraulic Power Unit
The electric motor requires 220 volt power on a 30 amp circuit. Most shops will prefer to drop the power down from the ceiling for hookup to the motor switch box as per local code. The hydraulic pump is mounted between the motor and the reservoir tank. The pump is equipped with valves that have preset pressure limits to prevent lifting over the rated capacity. DO NOT ATTEMPT TO ADJUST THE FACTORY SETTINGS OF THE PRESSURE VALVE. When the up button is pressed the fluid is pressurized and sent along the hoses to the cylinders to provide lift to the carriages and arms. The pump also has a lowering valve that is activated by the down lever. The down valve allows the fluid to return to the reservoir tank while lowering the lift.
The hoses and cables are routed to each post via the overhead beam on an overhead style lift or under the floor cover on a floor plate style lift.
Vehicle Lift Safety
Training in the proper use of the lift is mandatory before attempting to lift a car. Although lifts have an excellent safety record, vehicles can be loaded improperly. When a vehicle comes down by accident, this is usually due to carelessness, misuse, or neglected maintenance.
The American National Standards Institute (ANSI) and the Automotive Lift Institute (ALI) have set the American National Standard (ANSI/ALI ALCTV - 2011) for automotive lifts. This standard list safety requirements for operation, inspection, and maintenance of lifts. It requires annual lift inspection by a qualified lift inspector. ALI is also working on a new certification for lift inspectors. This annual inspection is designed to keep automotive lifts in good operating condition.
Center of Gravity
Find the center of gravity of the vehicle and position it over the posts of the lift. The center of gravity is the point between the front and the rear wheels where the weight will be distributed evenly. Different positions are used for front wheel drive and rear wheel drive cars.


According to the Automotive Lift Institute:
On rear wheel drive cars, the center of gravity is usually below the driver’s seat. On front wheel drive cars, the center of gravity is usually slightly in front of the driver’s seat, beneath the steering wheel.
Safety Note - Remember that you are lifting a vehicle that weighs several thousand pounds. The car must be correctly spotted on the lift so that the center of gravity is correct. Positioning the center of gravity is very important. On a two-post above ground lift, do not position the vehicle to the front or rear of the posts just so the door can be opened easier. Refer to asymmetric lift loading to determine a car's offset for door clearance.
Safety Tips for Operating 2 Post Car Lifts
- If there are any problems with the lift, do not use it. See your supervisor immediately. Do not take chances.
- When lifting, first raise the vehicle until its wheels are about 6” off the ground. Then jounce the vehicle and double check the contact between the adapters and the frame to be sure the vehicle is safely engaged.
- Be certain that all 4 lift pads are contacting their lift points and bearing a load. It is not uncommon for three lift arms to be touching the car with the fourth one free to move. If a lift arm can be moved after a car is in the air, the car is unevenly loaded. Lower the car and reposition the arm.
- If a lift arm is positioned improperly, lower the vehicle slowly to the ground and reposition the arm.
Safety Note - Some lifts have swing arm restraints that hold the the unloaded arm in position to prevent accidental movement. These restraints are not designed to prevent the car from falling if it is not properly positioned. Arm restraints engage after the lift is raised a couple of inches off the ground and will release when lowered back to the ground.
Safety Note - The weight of the vehicle must be distributed evenly. If using a 10,000-lb. capacity 2-post lift, each arm is rated for 2500-lbs. Do not overload one end of the lift.
- When performing repairs to a vehicle raised on a frame contact lift, do not use a large prybar or do anything else that might knock the vehicle off the adapters. When tight bolts are encountered, it is best to use an air impact wrench on them.
- Be sure that the lift contact points on the vehicle are in good condition and free of oil or grease.
- Some lifts have different length arms in the front than they do in the rear. These are called asymmetrical arms. Be sure to consult the manufacturer’s instructions before using this type of lift.
- All lifts have a safety latch system to be used once the desired lift height is reached. Always lower the lift into the locked position before going under the vehicle. Never use a lift that not able to engage the safety latch system. Tall jack stands are often used to assist load changes while working on a lift.
- The lift area should be clean with no grease or oil on the floor. Hoses, extension cords, and tools should be stored in the places where they belong.
- Do not allow customers to drive their own vehicle onto the lift. Insurance companies usually prohibit customers from being in the lift area.
- Be sure that the lift has adequate capacity to lift the weight of the vehicle. If the vehicle contains any loads inside, in the trunk, or in the bed of a truck, the center of gravity will be affected and the vehicle may be unsafe to lift.
- Be sure that the lift is all of the way down before attempting to drive a car on or off it.
- Before lowering a vehicle, be sure to alert anyone nearby. Be certain that no tools or equipment are below the car. All of the car’s doors should be closed.
Safety Tips Guide can be purchased from ALI website store at ww.autolift.org.
Related:

