Restoration with a Car Rotisserie
Car restoration is a painstaking process, for sure, but there's no other hobby that's quite as rewarding. Because when you are finished, you can get behind the wheel and drive your handiwork around for everyone to see. You become one with the very parts that you yourself brought back to life, and the satisfaction that you feel is absolutely amazing. Whoever claimed “you can’t get no satisfaction” had never restored a car using a vehicle rotisserie.
The passion for the car we once owned or the one a friend or family member had is what drives our desire to restore and keep those fond memories alive. There is a special feeling we get when we are in the presence of a cool ride that is in pristine condition. When we see an older model car that looks so good that it appears as new, it can only mean one thing...it has been totally restored by means of a rotisserie.
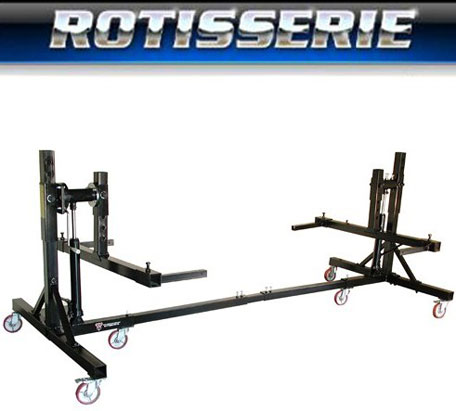
Weaver Car Rotisserie shown with Hydraulic Package, 5” Poly Casters and Rotator Handle
A rotisserie restoration is when we totally disassemble the car and the body is taken off the frame. The body and/or frame is then placed on a car rotisserie. After assembling the Weaver Car Rotisserie, and once balanced and raised to the proper height, it can be turned or rotated to show every space on the car. Any type of service that the body/frame needs can be accomplished while mounted on the auto rotisserie. It can be sandblasted to the bare metal, have any type of body work completed, primed, painted and reassembled the same way the factory did it with every angle accessible at a comfortable working height.
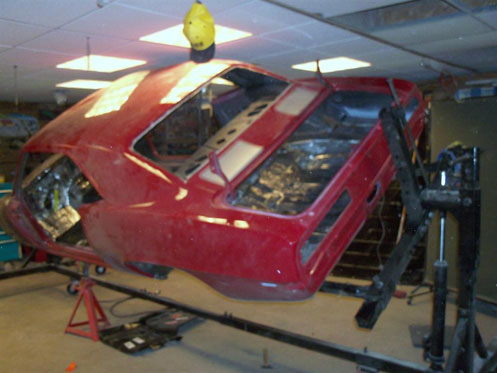
Camaro Body Mounted on a Car Rotisserie
The rotisserie is truly the key to obtaining an “as new” condition for any restoration project. It is important to note that there is a variety of adapters to have when using this piece of equipment. Certain adapters such as “Valance Brackets” (allow easy hookup to valance support), “Universal Door Bars” (used to support/brace the door jams when door is removed), “Universal Body Brackets” (customizing plates for matching body mount holes), and “Leaf Spring Brackets” (for easier spring mount hookup) can make the task of mounting the body/frame a much easier job. As with any job, the right equipment and tools can make all the difference and save valuable time.
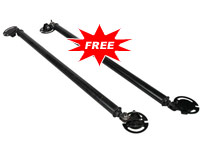

Universal Door Bars and Universal Leaf Spring Brackets 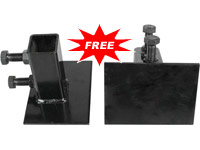
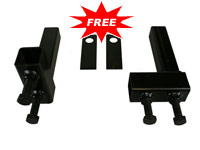
Universal Body Brackets and Valance Brackets
When selecting an auto rotisserie for your next project it is important to note - Some equipment distributors charge extra for each adapter while others may choose to include the most popular adapters as standard equipment. Some suppliers also charge extra if you want the equipment painted as well as the hydraulic lifting package.
How to Mount a Vehicle on an Automotive Rotisserie
Specific directions for W-Rotisserie Vehicle Mounting
Before mounting the body on an automotive rotisserie, identify the mounting method or mounting location. You will have to determine the best location as it must be a strong enough mount to hold the weight. On typical full frame cars, you can usually mount to the body mounts. Chevrolet unibodies can be front mounted at the firewall where the subframe is removed. The rear mount can be accessed at the bumper mount with unibody brackets or by using the leaf spring brackets to mount at the leaf springs mount leaving room for the rear valence. The Mopar and Ford unibodies can be front mounted by accessing the side of the frame rails where the bumper brackets are mounted. On the rear they can be mounted at the bumper mount using unibody brackets or at the leaf spring mount using leaf spring brackets. It is up to you to determine the integrity and strength of the mounting locations being used.
NOTE – Check the mounting positions you have decided to use to make sure they have the structural strength for the load. Correct any structural support issues before mounting to the W-Rotisserie.
Start with the vehicle on jack stands or other elevated structure with at least 18-20” off the floor. Center the 2 towers at the front and rear of the vehicle. Check the same distance left to right from the center of the swing arm (upside down T) to each mounting arm. If the vehicle has one side heavier than the other, you may need to offset the towers towards the heavy side. Attach the mounting arms or proper brackets to your vehicle body. Tighten the bolts on all mounting locations as well as where the mounting arm is attached to the swing arm. Insert the center connecting tubes into the center legs of each tower. Make sure each tower, or base, is perpendicular to the floor and parallel to each other. Tighten the bolts on the center tubing without overtightening.
Check all the mounting locations and that all bolts are tight. Any loose connection could lead to damage or injury. Take the time to double check all connections. Begin raising the vehicle body by using the hydraulic jacks. Having 1 person at each end is best to maintain the vehicle is level. With only one person available, raise one end 3 inches at a time by alternating each end until the desired working height is achieved. You can now move all previously used jack stands and supports the vehicle body was sitting on as it should now be properly mounted on an automotive rotisserie.
How to Balance a Car on a Rotisserie
Specific directions for W-Rotisserie Vehicle Balancing
Note: Do Not Attempt to use the rotating crank handle to spin the vehicle when the vehicle is not centered and balanced. Attempting to spin the vehicle using the Rotating Crank Handle when the vehicle is unbalanced can cause personal injury, vehicle damage and damage to Rotating Crank that will not be covered by warranty.
Always perform balancing adjustments to the balancing system with the swing arm (upside down T) in the upright position. Always start with the Swing Arms (upside down "T") as low as it can be. NOTE: This will make the vehicle bottom heavy to help prevent causing an accident or personal injury. Use caution to prevent the body from becoming dangerously top heavy. Tighten the lock nut on the Pivot Point Base to prevent the vehicle from turning during adjustment. NOTE: This is what prevents you from turning while adjusting. Support the weight of the vehicle using jack stands. Raise the mounted vehicle slightly using a floor jack to allow removal of the Bolt, Washer and Nut that holds the Swing Arm in place. Raise the swing arm to the next hole using a floor jack. Replace Bolt, Washer and Nut and tighten. Raise Jack Stands to support vehicle weight. Repeat on the other end of Rotisserie.
Test the balance by rotating/pushing the vehicle from side to side. If the vehicle is still bottom heavy, REPEAT the steps testing the balance in each hole. NOTE: As long as you do not skip holes the difference from one hole to the next is never so great as to become uncontrollable.
CAUTION: If you attempt to rotate an unbalanced vehicle you may risk personal injury and create an unsafe situation and possible damage to your vehicle.
W-Rotisseries equipped with Balancing Rods are infinitely adjustable, like a screw jack, to fine tune and get the weight of the vehicle balanced. Adjust each end by going back and forth or having a person adjust at each end. As you raise the vehicle body you can swing the body back and forth like a pendulum. The more you raise it, the more pendulum action you will get. If you can push the body to a vertical position with ease, it is balanced. Check the low clearance on the center tubing by rotating the body 360 degrees. Lock it in place with the bolts on top of the pivot.
Once the vehicle is balanced on the automotive rotisserie, or W-Rotisserie, you can use the Rotating Crank Handle to rotate the balanced vehicle.

